Because everyday is an art attack day. Our colored siopao ready to turn into giant beads. #papiermache #beads #paper #craft
Uncategorized
#drawing #pen #ink

Field with coconut
20 x 30 inches
Pen, ink and pencil on board
December 5, 2013
Tribute to Van Gogh’s Wheatfields. Task was to replace one element — I took out the cypress and put in a buko tree.

Pruning the vines under rainclouds
Pen and ink on board
20 x 30 inches
December 5, 2013
Composition using Van Gogh’s drawings: combined two separate works (fields and horizon line) into one drawing.
#drawing #ink #pen #harvest #field

Mother and child.
Pen on board
20 x 30 inches (1/2 illustration board)
November 21, 2013
Applying Van Gogh’s technique to another subject. Drawn from life.

Sower: Tribute to Van Gogh’s lines
Pen on board
20 x 15 inches
November 21, 2013
Adopt-a-Master exercise
***Warning : long and self-indulgent post. Sharing for you, friends, to bear witness. To those that do, thank you.***
The new year always starts early for me. I mark it on my birthday, the 15th of December.
Yolanda has made it a struggle to welcome the coming year with joy, and on top of that, am so feeling the birthday blues.
Today, twenty days before the next turn, I followed an inner prodding to re-collect the past year.
Here’s to closing 2013 in understanding and healing:
Backtrack for context: September 2012 I moved into a new home that took me two years to build. Much, much love went into that house and it was my intent to start planting seeds of all kinds there.

December 2012 saw me more settled in, but already braving new questions, among them, “What now?”

It was an exercise in trusting that I was exactly where I needed to be:

A new home meant new energy, and many days were spent welcoming friends and family into that space.

With the stress of homebuilding behind me, I could also relax more.

There were silly days…
 …
…

November-December is the darkest time of the year, both literally and spiritually. Christ was born in December, as the light in the darkness. Hanep no? Never became aware of it or considered it until now, that it’s probably why birthday blues also hit me. I’m moving with the season.
Twenty days ’til 33.
Thirty days ’til the light of the new season.

Transitions have always been bittersweet for me. Masarap na masakit. December is transition time: I turn a year older, Christ is reborn and re-lived in our lives, and the New Year sets in. This comes full circle by the end of January, when the Chinese New Year begins. Closing and opening cycles.
Especially given #YolandaPH, we wait for this year’s light, this year’s Christ, with much anticipation.
How are you preparing? Yourself, your family, your home?
* * *
I read Lynn Jericho for her insights on inner work, and saw just now that she has an Inner Advent program starting on November 30. Do take a look if you have time. She says:
The anticipatory mood of Advent bears paradox as it alerts us to both ending and beginning. Consciously end the old year, so you can consciously begin the new year.
Traditional Advent, shaped by the Church and incorporating ancient pagan practices, focuses on the coming of the celebration of Christmas and the birth of Jesus – it awakens feeling for the story of the event in Bethlehem so long ago.
Inner Advent, for the modern, self-seeking soul, guides you through a creative and compassionate recollecting, reviewing of your life over the previous 50 weeks making you aware of your process of inner development. It brings you to a more conscious relationship to yourself. You look back to see forward. Inner Advent focuses you on preparing for the birth of a new self through the sacred mysteries of the Holy Nights. It prepares you for the active celebration of your Inner Christmas.
And to be playing with oil pastels in a new way: smudging and brushing with linseed oil.

Work in progress.
Oil pastel on 15×20 primed board.
Second attempt below.

Resisting the urge to smudge. First layer of heavy strokes. Mom @bigbons this for you. Love xx
#oilpastel #drawing #painting
I think I’ve found my new fave medium!
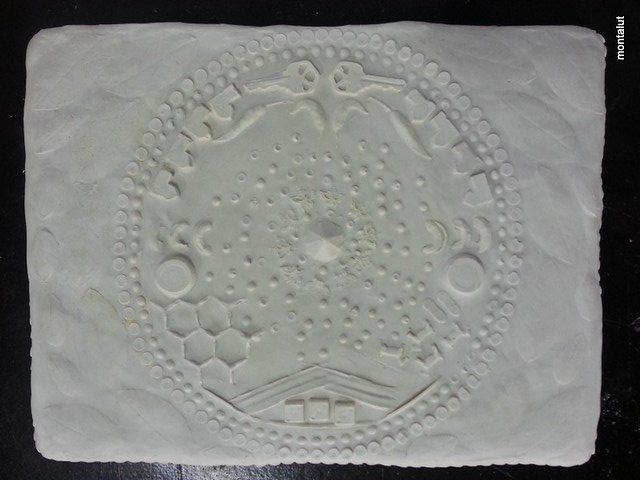
Mandala: Centering at 32
Plaster
12″ x 16″ x 1″
October 2013
We were asked to do an autobiographical relief (that means a half-sculpture, like a raised drawing) using clay as a mold. We were to mark the clay with found objects that were special to us.
Can you make out the different objects embossed on my mandala? There’s a nut in there somewhere, a couple of gameboard pieces, tips of long things we use everyday, etc.
Problem:
How do you narrate an autobiography through a relief sculpture?
Procedure:
- Make a mold border measuring 12″ x 16″ x 2″ (inside measurement) using wood.
- Lay 1″ flat layer of modelling clay inside the mold border, and leave the remaining 1″ empty.
- Create texture and debossed images by pressing objects against the clay layer to achieve your desired autobiographical composition.
- Pour plaster of paris up to the rim of wood border, and use a piece of flat wood to level the plaster cast and remove excess material.
- Separate the plaster relief from its clay mold.
- Clean and prepare for presentation.
I was sick on demo day so I wasn’t so confident to do it on my own at home… True enough, my first attempt failed, and it took careful experimentation with the plaster mix and clay pressings to get it right on the second try.
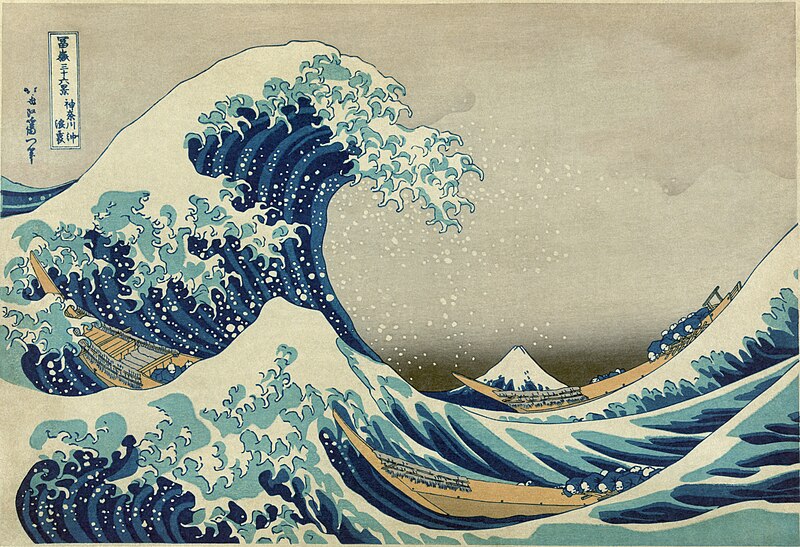
I originally wanted to do a piece on “flow”. My first design was a wave, inspired by The Great Wave at Kanagawa (from a Series of Thirty-Six Views of Mount Fuji) by Katsushika Hokusai:
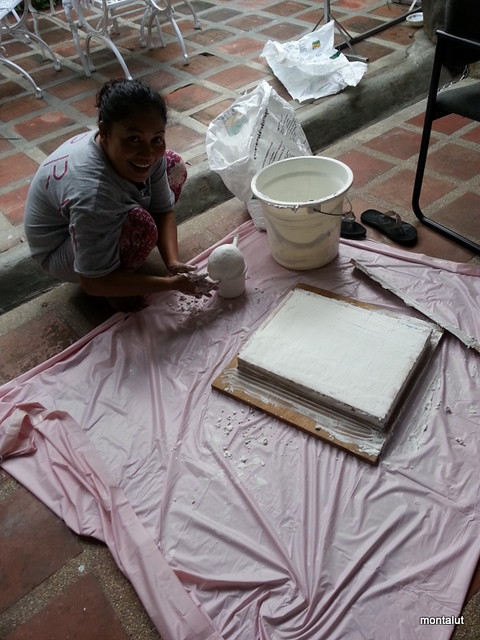
Here’s Cris helping me out with a big smile. The plaster was already dry at this point and ready to be separated from the mold.
We were careful in removing the wooden frames– the slightest pressure would crack the sculpture.
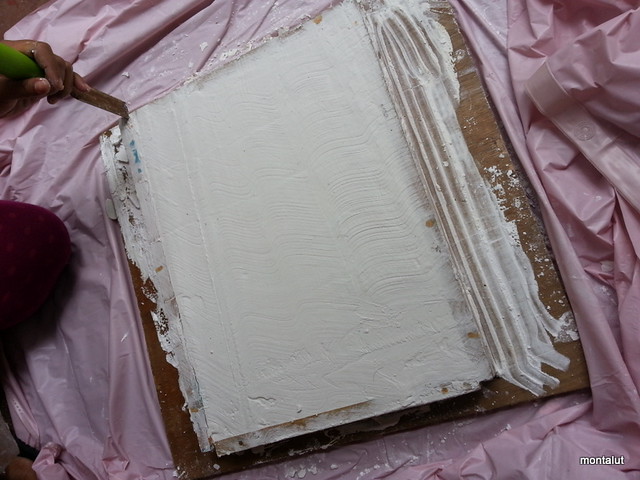
Because I skipped the demo, I didn’t know that you weren’t supposed to do it this way.
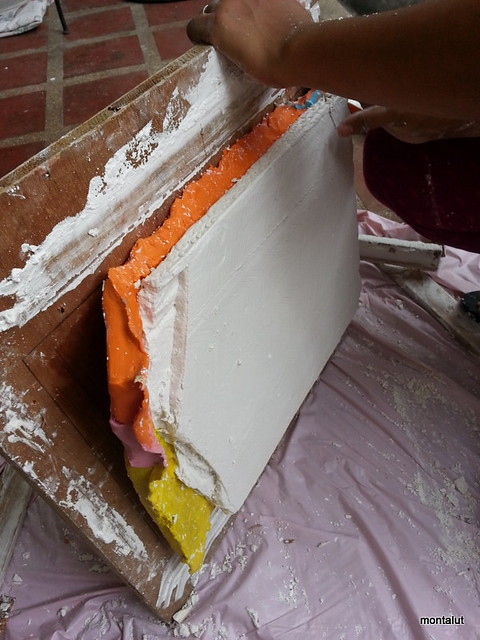
The right way would’ve been to just lay the whole thing on the floor with the plaster side at the bottom, remove the frames all around, then lift the wooden backing and clay off the sculpture. …
Halloween came early to UP this year.
We had spider webs all over the Fine Arts department as early as July:

Self-portrait using lines
Plastic straw
1′ x 1′ (portrait dimensions)
July 2013
Task was to make a spider web using any kind of thread, and somewhere in there, put our face.

I chose this spot because there were so many nooks and crannies I could latch on to. Also wanted to make a big piece so I decided to use the cheapest thread I could think of: plastic straw!

My intention was to do a messy, sheet/funnel web. I didn’t want to give myself a hard time so I used white straw for the web and blue for the portrait.

Half the time I had no idea what I was doing, but just kept spinning like a spider would spin and after maybe 2 days of working, I started seeing– or more aptly, feeling– the web.
I also spun a grid (in yellow) just to guide me in making the face:
 …
…
Self-portrait using lines: spider web installationRead More »

Coral garden
PET bottles and white latex paint
12″ x 12″ x 12″
September 2013
My first green art, made from recycled plastic bottles.
I wanted to make something I’d love to keep and display at home, so I thought of arranging “plants” under the sea that I could easily put on top of a table later on.
Problem:
How do you transform the PET bottle structure to create a 3D sculpture that articulates an undersea creature form?
Procedure:
- Alter, cut, punch, slice, etc. the PET bottle.
- Assemble by gluing, riveting, bonding to create a sea creature form mimicking its natural gesture, measuring at least 12″x 12″x 12″.
- Whitewash the entire sculpture using white latex.
- Hang/attach/install the work outdoors mimicking its natural gesture.
Corals and anemones are sea creatures, right? 🙂
My attempt at planning: doing sketches helped me start the process but I didn’t really bother to look at them once I began working:

I played with the bottles using a candle, but after these two, my chest started feeling heavy from the fumes I was inhaling. How anti-green: we were upcycling used plastic bottles, but here I was burning plastic! Tsk, tsk, sumubok lang.

I decided to just stick to cutting and creating coral forms using scissors and cutter:

It was a space-consuming work — I probably had over 30 bottles in all sizes scattered all around the house for 3 weeks!

I used silicone to glue them together and repositioned the corals until I was happy with the garden.
Ready for painting:

Here’s how it looked, glued, painted and laid out on the table:

I thought it looked perfect plopped on top of this big rock — isn’t it mimicking its natural gesture already?

These were installation pieces, though, that needed to suspended at least 1 foot above the ground and also 1 foot away from any surface.
My big takeaway from this plate: pay attention to instructions! I didn’t realize the last bit– to hang the work– was critical and when time came to install mine, it really just fell apart. The silicone adhesive wasn’t strong enough to hold it together, and I spent 3 hours “sewing” the piece together using thin GI wires (alambre).


It was only after slaving over the installation that I realized I could’ve just put it on a flat base and suspended the base as a whole!
Here we are on presentation day, ready to swim around our life-size aquarium:

“The Chase” with works by Stanley, Grasha and AK:


Close-up of Stanley’s hammerhead shark

Ariel’s lobster:

Tin’s amazing jellyfishie:

Also loved this seadragon by KC:

Abie’s anglerfish:

Jack’s fierce fish (was this a dragon fish?), which Sir Jamel said best captured the essence of this plate: to create a creature in its natural gesture.


